
10 Easy Hairstyles You Can Do in Under 5 Minutes
Running late again? You’re not alone. Most mornings feel like a race against time.
Your alarm didn’t go off, you can’t find your keys, and your hair looks like you stuck your finger in an electrical socket.
But here’s the good news: you don’t need an hour-long beauty routine to look put-together.
These ten quick hairstyles will transform your messy bedhead into Instagram-worthy looks faster than you can brew your morning coffee.
1. The Classic Messy Bun
You’ve probably tried this one before, but let’s perfect it. The messy bun works for literally everyone and takes less than two minutes to master.
Start by gathering your hair into a high ponytail. Don’t worry about making it perfect – imperfection is the goal here.
Twist your ponytail loosely and wrap it around the base. Secure with a hair elastic, but don’t pull your hair all the way through on the final loop.
Leave about two inches of your hair sticking out to create that effortlessly messy look.
Pull out a few face-framing pieces and gently tug at the bun to make it fuller. This technique adds volume and creates the perfect “I woke up like this” vibe.
The beauty of this style lies in its versatility. You can dress it up with a decorative hair clip for work meetings or keep it casual for weekend errands. It works on day-old hair even better than freshly washed locks.
2. The Sleek Low Ponytail
Sometimes simple sophistication wins over elaborate styling. The sleek low ponytail gives you that polished, professional look without the fuss.
Apply a small amount of smoothing serum to damp or dry hair. Use a fine-tooth comb to slick your hair straight back, ensuring you catch every flyaway.
Gather your hair at the nape of your neck and secure with a clear elastic.
Take a small section of hair from underneath your ponytail and wrap it around the elastic to hide it.
Secure the wrapped section with a bobby pin that matches your hair color. Finish with a light mist of hairspray for all-day hold.
This style works beautifully for job interviews, client meetings, or any situation where you want to look effortlessly elegant.
It’s also perfect for second-day hair when you need to look fresh but don’t have time to wash and style.
3. The Half-Up Top Knot
The half-up top knot combines the best of both worlds: you get your hair out of your face while still showing off your length.
Section off the top portion of your hair from ear to ear. Gather this section high on your crown and twist it loosely.
Create a small bun by wrapping the twisted hair around itself and secure with an elastic.
Gently tug at the bun to make it fuller and more relaxed. Pull out a few pieces around your face to soften the look. Let the rest of your hair fall naturally over your shoulders.
This style works particularly well if you have layers or if your hair is too short for a full up do. It’s trendy enough for brunch with friends but professional enough for the office.
4. The Quick French Twist
Don’t let the name intimidate you – this French twist is much easier than it sounds and looks incredibly sophisticated.
Brush your hair to one side and gather it low at the back of your neck. Hold it with one hand while using your other hand to twist the gathered hair upward.
Keep twisting until you create a vertical roll along the back of your head. It’s particularly flattering if you want to show off statement earrings or a beautiful neckline.
Tuck the ends of your hair into the twist and secure everything with bobby pins along the seam. Use pins that match your hair color and insert them at angles for better hold.
This elegant up do works perfectly for dinner dates, work presentations, or any time you want to look instantly more polished.
5. The Braided Headband
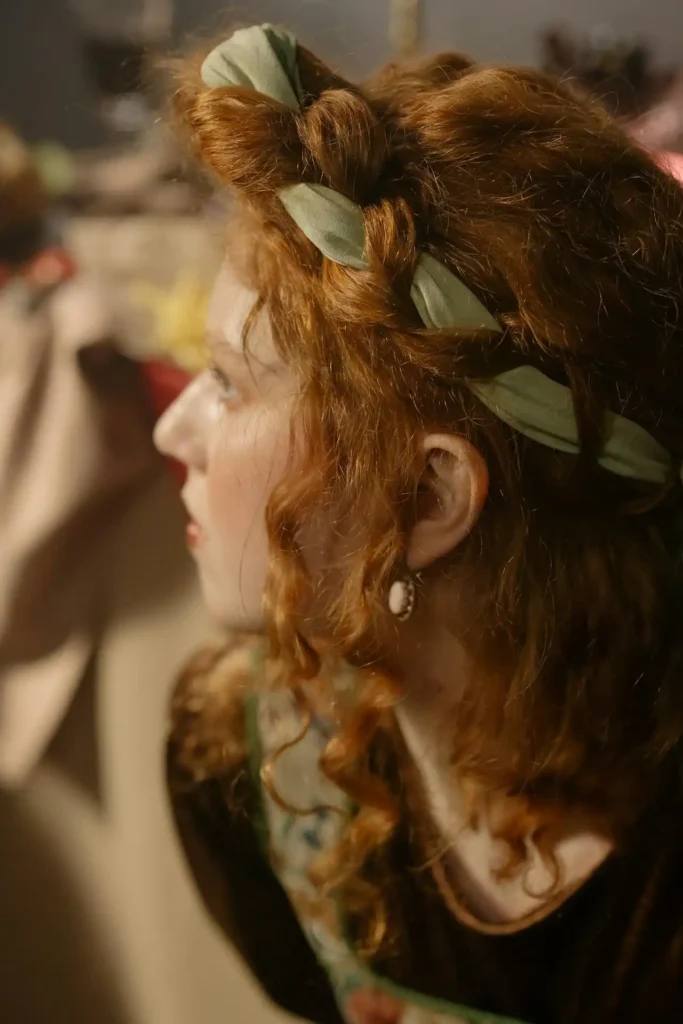
Create your own hair accessory with this charming braided headband that keeps hair out of your face while adding visual interest.
Take a section of hair from behind one ear and divide it into three equal parts. Create a regular three-strand braid, keeping it relatively tight so it holds its shape.
Braid until you reach the length that will stretch across your forehead to behind your other ear.
Secure the end with a small clear elastic. Bring the braid across your forehead like a headband and pin it behind your opposite ear with bobby pins.
Make sure the pins are hidden under your hair. This style works beautifully with both straight and wavy hair textures.
It’s perfect for keeping your hair controlled during workouts or adding a bohemian touch to your everyday look.
6. The Twisted Side Sweep
This romantic style takes advantage of your hair’s natural texture and creates an asymmetrical look that’s both modern and timeless.
Part your hair deeply on one side – much deeper than your usual part. Take a section of hair from the heavier side near your face and divide it into two parts.
Twist these sections around each other, working your way back toward your ear.
Secure the twist with a bobby pin behind your ear, making sure to hide the pin under other layers of hair. Let the rest of your hair fall naturally to one side.
This style works especially well if you have some natural wave or texture in your hair. It’s romantic enough for date nights but understated enough for professional settings.
7. The Double Dutch Braids
Double Dutch braids might sound complicated, but they’re just two simple braids that create a sporty, youthful look.
Part your hair straight down the middle from your forehead to the nape of your neck. Start with one side and take a section of hair at your hairline.
Divide it into three parts and begin braiding, but instead of crossing sections over the middle, cross them under.
Continue adding hair to the outer sections as you braid down toward your neck. This creates the “Dutch” or “inside-out” effect. Secure with an elastic and repeat on the other side.
These braids are perfect for active days, hot weather, or when you want a fun, casual look. They work on all hair lengths and actually look better when they’re a little loose and lived-in.
8. The Textured Ponytail
Transform a basic ponytail into something special with a few simple texturizing techniques.
Before creating your ponytail, add some texture to your hair. Scrunch damp hair with texturizing mousse and let it air dry, or use a texturizing spray on dry hair.
Gather your hair into a ponytail at whatever height you prefer. Secure with an elastic, then gently tug at sections around your crown to create height and movement.
Here’s the key: don’t make it too tight. Use your fingers instead of a brush to gather the hair, which preserves natural texture and volume.
Wrap a small section of hair around the elastic to hide it, just like with the sleek ponytail. The difference is in the texture – this version looks more relaxed and modern.
9. The Quick Space Buns
Space buns aren’t just for music festivals – when done right, they can be playful and chic for everyday wear.
Part your hair straight down the middle. Create two high ponytails on either side of your head, positioning them slightly forward from the very top.
The placement should be symmetrical but not so high that you look like you have horns. Pull out a few face-framing pieces to soften the look.
Twist each ponytail and wrap it around itself to form a bun. Secure with elastics and don’t worry about making them perfectly neat.
This style works particularly well if you have medium-length hair or long layers. It’s fun for weekends, creative workplaces, or any time you want to add a little personality to your look.
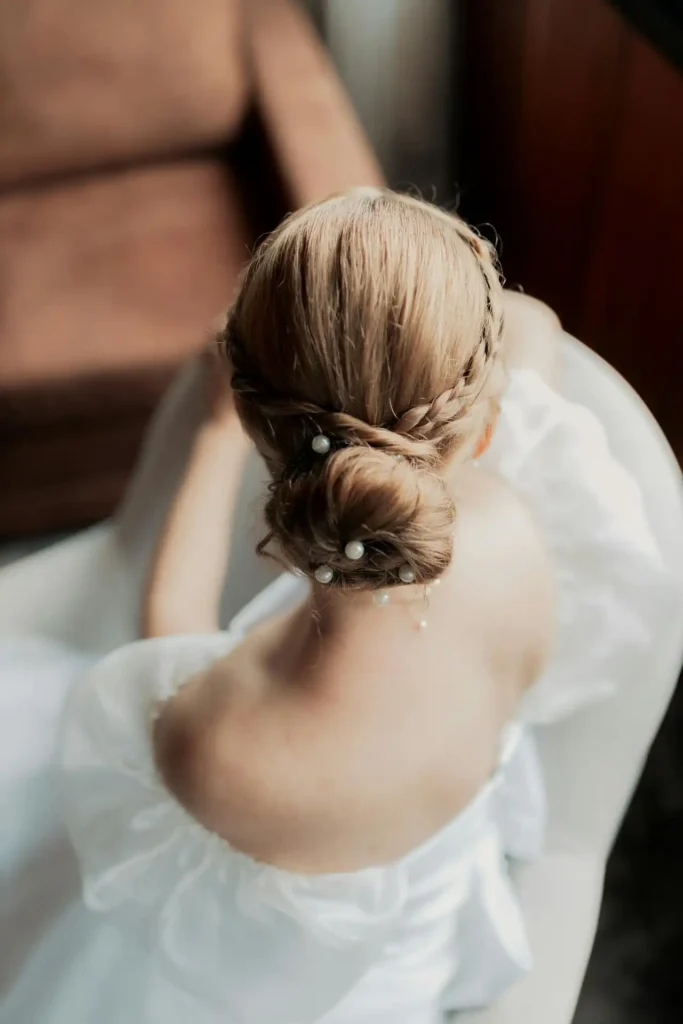
10. The Low Braided Bun
Combine the elegance of a bun with the detail of a braid for this sophisticated yet simple style.
Gather your hair into a low ponytail at the nape of your neck. Instead of twisting the ponytail like you would for a regular bun, braid it loosely.
Don’t worry about making the braid too tight – you want it to look relaxed. Wrap the braided ponytail around its base to form a bun.
The braid will create beautiful texture and visual interest. Secure with bobby pins, making sure to hide them within the braid pattern.
Gently tug at the braid to make it look fuller and more relaxed. This technique, called “pancaking,” makes the braid appear more voluminous and creates a more romantic, undone finish.
Conclusion
With these ten quick styles in your arsenal, bad hair days become a thing of the past. Practice makes perfect, so don’t give up if they don’t work immediately!


